What Is EDM Wire Cutting
Understanding Wire EDM
Wire Electrical Discharge Machining (Wire EDM, or WEDM) is a cutting-edge manufacturing process that uses electrical sparks to slice through metal with incredible precision. Think of it as a high-tech scalpel for metal, capable of crafting intricate shapes with tolerances as tight as a few microns. It’s a go-to method for industries that demand perfection, like aerospace, medical device manufacturing, and toolmaking.
How It Works
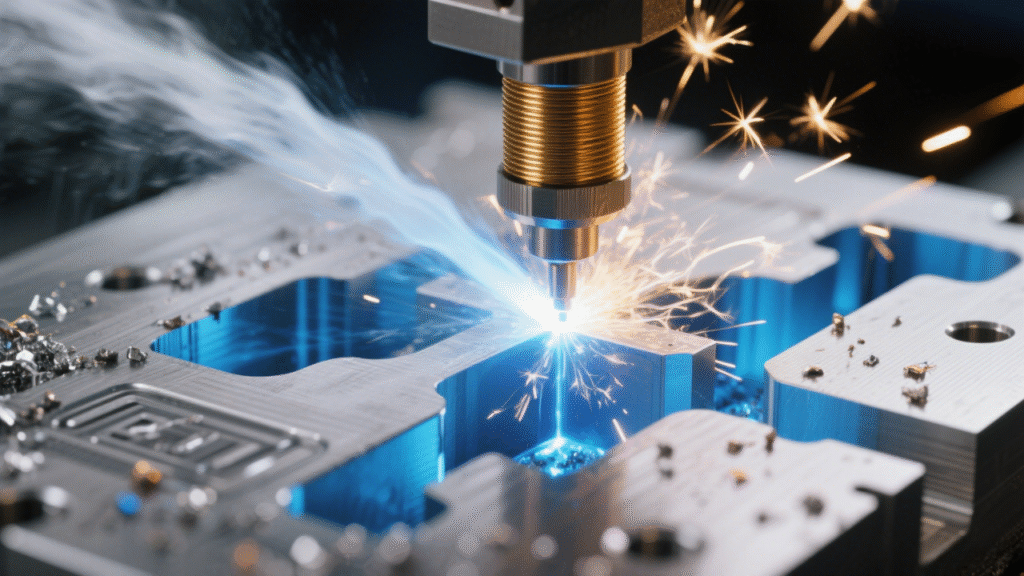
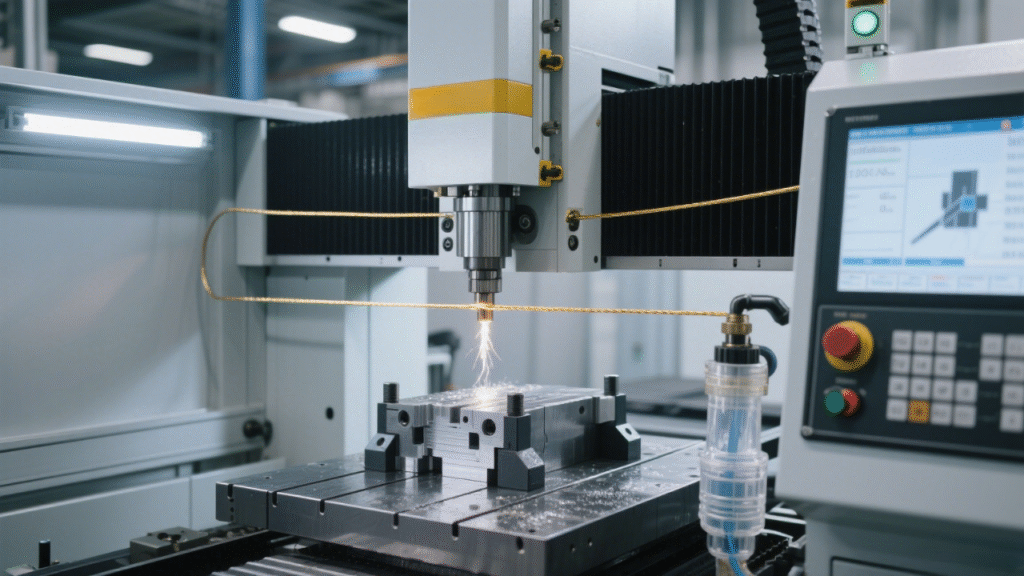
Wire EDM operates on a simple yet ingenious principle: controlled electrical discharges. A thin metal wire—typically brass or molybdenum—acts as an electrode, guided by a CNC system along a programmed path. This wire hovers just a hair’s breadth (0.01 to 0.05 mm) from the workpiece, never touching it. A high-voltage power supply sends rapid pulses between the wire and the workpiece, sparking tiny, intense bursts of heat—think 8,000 to 12,000°C. These sparks melt or vaporize the material in precise, controlled increments.
During the process, a steady stream of deionized water (or another dielectric fluid) flushes away debris and keeps the cutting zone cool, ensuring stability and cleanliness. Since there’s no physical contact between the wire and the workpiece, there’s no mechanical stress, which translates to razor-sharp accuracy and smooth surface finishes.
Operators can fine-tune settings like wire speed, pulse frequency, and current to match the material—whether it’s stainless steel, titanium, or hardened tool steel. Advanced Wire EDM machines even handle multi-axis movements, making complex 3D shapes a breeze.
Where It Shines
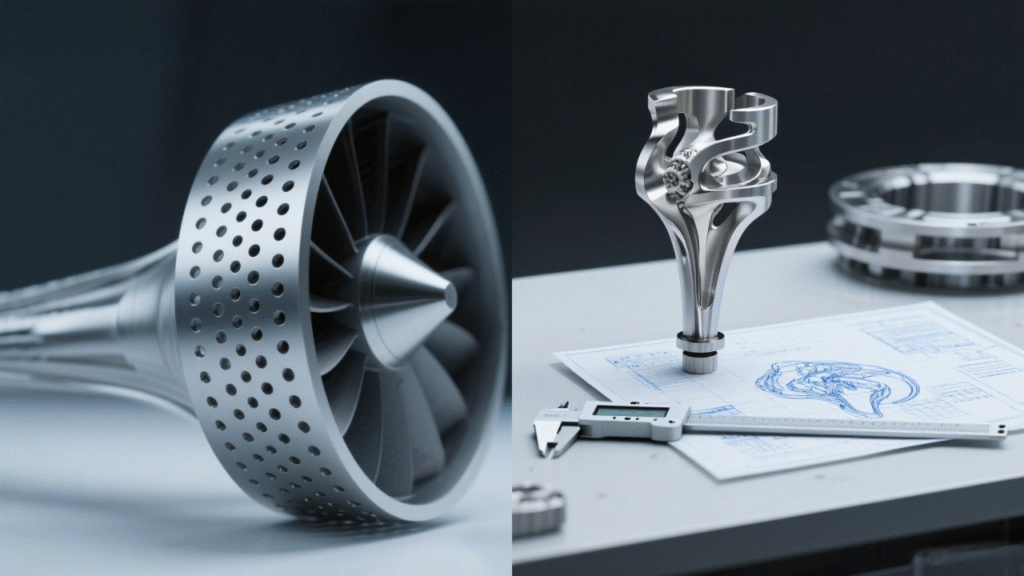
Wire EDM is a rockstar in industries that require pinpoint precision. In tool and die manufacturing, it’s the go-to for crafting stamping dies and injection molds, nailing tight tolerances and intricate geometries. Aerospace relies on it for cutting turbine blades and engine components from tough materials like titanium and nickel alloys, which laugh in the face of traditional machining.
In the medical field, Wire EDM shapes tiny, life-saving parts—like orthopedic implants, dental tools, and surgical instruments—with micron-level accuracy, ensuring both functionality and biocompatibility. From hardened carbide to delicate contours, Wire EDM delivers unmatched versatility and reliability.
Why It Matters
Wire EDM’s real magic lies in its ability to tackle materials and shapes that would give traditional machining a headache, all while maintaining jaw-dropping precision. By mastering its principles and applications, engineers and machinists can make smarter choices for projects in mold design, aerospace components, or medical devices. Proper setup and parameter tweaks can boost efficiency and part quality, making Wire EDM a game-changer in precision manufacturing.
Pros and Cons of Wire EDM
Wire EDM is a powerhouse in precision manufacturing, but like any tool, it has its strengths and limitations. Let’s break down what makes it shine and where it falls short, so you can decide when it’s the right fit for your project.
Advantages
Unmatched Precision
Wire EDM delivers tolerances as tight as ±0.002 to ±0.005 mm, blowing most traditional methods out of the water. It’s perfect for intricate features like sharp corners, narrow slots, or tiny holes—think aerospace components or micro-medical devices. CNC-driven wire paths ensure every cut is spot-on, making it a favorite for high-stakes applications.
No-Contact Cutting
Since Wire EDM uses electrical sparks instead of physical force, there’s zero mechanical stress on the workpiece. This is a lifesaver for delicate parts, like thin metal sheets (under 0.5 mm) or brittle materials like hardened steel. No contact also means no tool wear, ensuring consistent results and longer machine life.
Hard Materials? No Problem
Wire EDM doesn’t care how tough your material is. It slices through high-hardness metals like titanium, carbide, or nickel alloys with ease—materials that would dull or break conventional tools. This makes it a top pick for tool steel dies or aerospace engine parts, saving time and tooling costs.
Limitations
Slower Speeds
Wire EDM isn’t built for speed. Its material removal rate lags behind traditional machining—cutting a 1 mm thick piece of carbide might take minutes, while milling could do it in seconds. Thick parts or high-volume jobs can drag, so you’ll need to weigh precision against production time.
Wire Wear and Tear
The wire electrode (brass or molybdenum) wears down during cutting and needs regular replacement. This adds to material costs and can pause production if not managed. Molybdenum wires last longer but cost more; brass is cheaper but wears faster. Tweaking discharge settings can extend wire life, but wear is inevitable.
Conductive Materials Only
Wire EDM relies on electrical conductivity, so it’s limited to metals like steel, aluminum, or titanium. Non-conductive materials—ceramics, glass, or plastics—are a no-go. This restricts its use in industries like electronics or composites, so always check your material specs first.
Core Equipment and Consumables
- Machine Components:
- Wire EDM Machine: Includes a CNC system, power supply, worktable, and wire guide.
- Cooling System: Uses deionized water or similar fluids to flush debris and cool the cut.
- Electrode Wire: Typically brass (cost-effective) or molybdenum (high-precision).
- Consumable Tips:
- Brass Wire: Great for general mold work, budget-friendly.
- Molybdenum Wire: Tougher and longer-lasting, ideal for precision or hard materials.
- Dielectric Fluid: Monitor deionized water’s conductivity regularly to maintain stable discharges.
Practical Guide to Wire EDM
Setup, Operation, and Tips
Running a Wire EDM machine is both an art and a science. From prep to post-processing, here’s a step-by-step guide with pro tips to maximize efficiency and part quality.
Before You Start
Securing the Workpiece
A rock-solid setup is non-negotiable. Use vises, magnetic tables, or custom fixtures to lock the workpiece in place—any movement can throw off tolerances (aim for ±0.005 mm or better). For thin or irregular parts, custom jigs are your friend, but check clamping pressure to avoid warping.
Programming and Path Planning
Smart programming saves time and boosts quality. Use CAM software (like Mastercam or Cimatron) to generate G-code and optimize the wire’s path, minimizing unnecessary moves. For complex shapes, try a multi-pass approach: rough cuts for speed, followed by finishing passes for smoothness. Factor in the wire diameter (0.1 to 0.3 mm) and offset to nail the final dimensions.
Dialing in Parameters
Settings are your control panel for speed, precision, and wire life. Adjust pulse width, current, and wire speed based on material and thickness. For carbide, use short pulses (0.5 to 1 µs) and moderate current (5 to 10 A) to limit heat damage. For thick parts (over 50 mm), slow the wire speed (3 to 5 m/min) for stable sparks. Start with manufacturer guidelines, then tweak based on real-world results.
During the Cut
Keeping an Eye on the Wire
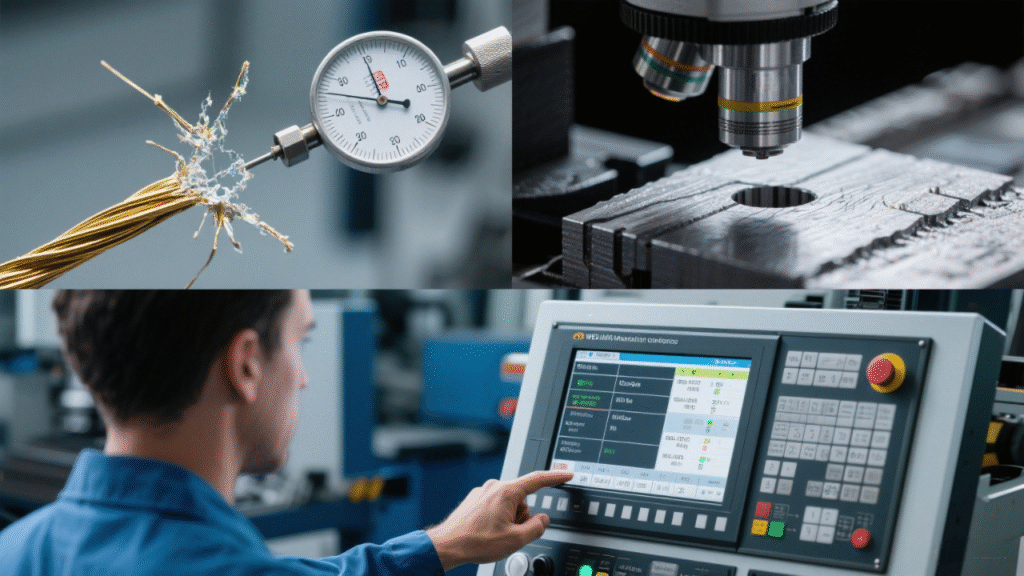
The wire is the heart of the operation. Check its tension (0.8 to 1.2 kg) regularly—too tight, and it snaps; too loose, and cuts get sloppy. Watch for wear, especially with brass wires under heavy sparking; inspect every 4 to 6 hours. Most modern machines have break-detection systems—use them to avoid costly downtime. If the wire wobbles or sparks get erratic, pause and inspect the guides and rollers for debris or misalignment.
Managing the Dielectric Fluid
Deionized water keeps the cut clean and cool. Ensure nozzles are aimed at the cutting zone and maintain steady flow to avoid air pockets that disrupt sparks. Check the fluid’s conductivity (5 to 20 µS/cm) and swap or filter it every 8 hours to prevent debris buildup. A clean dielectric system prevents clogs and keeps cuts consistent.
Handling Interruptions
If the wire breaks or power cuts out, don’t panic. Note the coordinates (X, Y, Z) at the break, manually reposition the wire to the breakpoint, and verify dielectric flow before resuming. Advanced machines often have auto-restart features—use them to save time. Double-check settings to ensure continuity.
After the Cut
Cleaning the Part
Post-cut, clean the workpiece ASAP to remove debris and dielectric residue. Ultrasonic cleaners or high-pressure water work wonders. Leftover ions can corrode metals like stainless steel or aluminum, so rinse thoroughly and dry with compressed air to avoid water spots.
Checking Dimensions
Accuracy is everything. Use micrometers, calipers, or optical comparators to measure critical features, ensuring they hit design tolerances (like ±0.002 mm). For complex parts, a coordinate measuring machine (CMM) can map the entire surface and flag deviations. Log your measurements to spot trends and fine-tune future runs.
Troubleshooting Common Wire EDM Issues
Even with the best setup, Wire EDM can throw curveballs. Here are three frequent problems, their causes, and how to fix them fast.
Frequent Wire Breaks
The Issue
The wire keeps snapping, halting production and risking part damage. This often happens during high-intensity cuts or long runs.
Why It Happens
Breaks stem from excessive spark energy or improper tension. High pulse energy overheats the wire, especially on tough materials like carbide. Tension above 1.5 kg or below 0.7 kg stresses or destabilizes the wire. Worn guides or insufficient dielectric flow can also contribute.
How to Fix It
Dial back the spark energy—lower current (e.g., from 10 A to 6 A) or shorten pulse width (from 1 µs to 0.6 µs). Set wire speed to 3–5 m/min and tension to 0.8–1.2 kg for stability. Inspect guides and rollers for wear or debris. Ensure dielectric jets are strong and steady. Test for 5–10 minutes to confirm fewer breaks.
Rough Surface Finish
The Issue
The part’s surface looks grainy or pitted, missing the desired smoothness (e.g., Ra 0.8 µm or better), which can affect performance.
Why It Happens
Dirty dielectric or unstable sparks are common culprits. Debris in the fluid disrupts even sparking, causing burn marks or craters. Short pulse intervals (under 5 µs) or high spark frequency overload the surface. Worn wires or material inconsistencies can worsen things.
How to Fix It
Swap out the dielectric for fresh deionized water (5–20 µS/cm conductivity). Increase pulse intervals to 8–10 µs and lower spark frequency for smoother cuts. Use a multi-pass strategy: rough cut, then 2–3 low-energy finishing passes (2–4 A). Replace worn wires. Test the new settings; you should see improvement within 10 minutes.
Inaccurate Cuts
The Issue
Dimensions miss the mark (e.g., beyond ±0.005 mm), or complex shapes are off, causing fit or function issues.
Why It Happens
Thermal distortion or machine misalignment are often to blame. Sparks generate heat that can warp thick parts (over 50 mm) or conductive materials like copper. Misaligned tables or guides (even 0.01 mm off) add up. High cutting speeds or loose fixtures can also skew results.
How to Fix It
Slow the cut to reduce heat—extend pulse intervals (10–12 µs) and lower current (4–6 A). Use multiple passes to refine dimensions gradually. Calibrate the machine with a laser interferometer to keep X/Y axes within 0.005 mm. Secure the workpiece tightly to eliminate vibration. Verify dimensions with a CMM and adjust parameters until tolerances are met.