5 Common Mistakes Made by CNC Machine Tool Beginners
CNC machines are powerful tools, but for beginners, stepping into pitfalls is almost inevitable. This article breaks down the 5 most common mistakes—from setting up workpieces to navigating the control panel—and shows you how to dodge them. Each section explains the problem, walks you through fixes, and tosses in practical tips to get you up to speed fast.
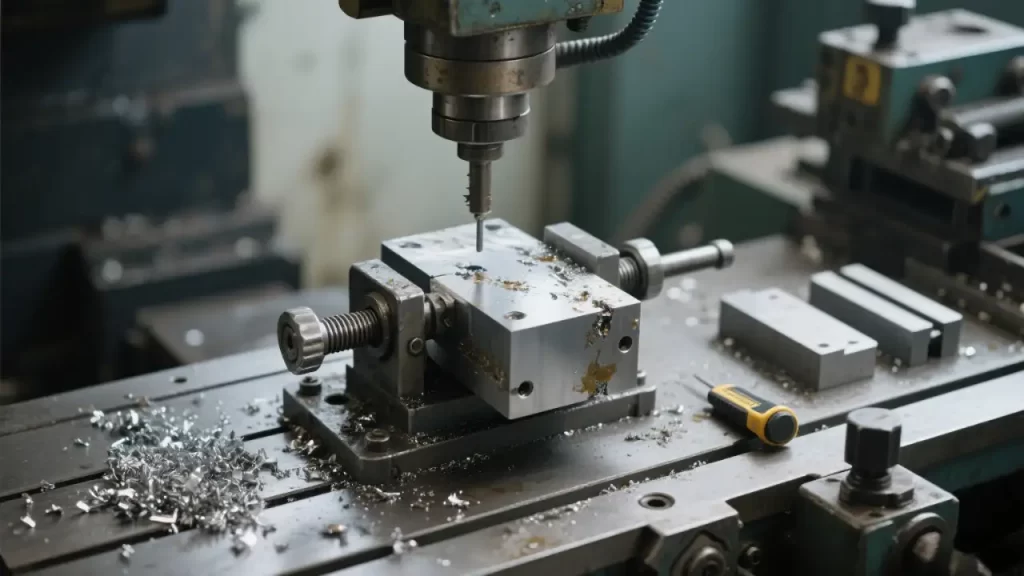
Not Setting Up Workpieces and Fixtures Properly
In CNC machining, setting up your workpiece and fixture is like laying a foundation for a house—get it wrong, and everything else falls apart. It sounds basic, but it’s the backbone of part quality and machine safety. Here’s how to nail it and why it matters.
Why It Matters
- Workpiece: The material you’re machining, like an aluminum plate or steel block.
- Fixture: The tool holding it in place, like a vise or custom jig.If these aren’t set right, the workpiece can shift, tools can crash, and the job’s toast—wasting time and materials.
Step-by-Step Fix
Step 1: Prep Work
- Check the Workpiece: Make sure it’s clean, no oil or burrs. Hit it with sandpaper or cleaner—takes a minute.
- Pick the Right Fixture: Match it to the workpiece size and shape. Small parts? Use a vise. Big or odd-shaped? Maybe a custom jig.
- Clean the Table: Chips or dirt on the machine bed mess with stability. Brush or blast it with air.
Step 2: Mount the Fixture
- Secure it to the table with T-slot bolts or clamps.
- Align It: Use a dial indicator to check it’s flat and straight.
- Tighten screws firm but not crazy—too much twists the fixture, too little leaves it wobbly.
Step 3: Load the Workpiece
- Place it in the fixture and lightly clamp.
- Set the Position: Use an edge finder to mark X, Y, Z starting points, matching your G-code.
- Clamp It Tight: No wiggle allowed. With a vise, start light, then gradually tighten—don’t crank it hard or it might warp.
- Ensure the tool path’s clear, no fixture in the way.
Step 4: Double-Check
- Shake It: Push the workpiece by hand. If it doesn’t budge, you’re good.
- Run a Dry Pass: Hit “Dry Run” on the control panel to fake a cut and check the path.
- Use a height gauge to confirm workpiece height and fixture match the program.
Common Issues and Fixes
- Workpiece Shifts: Not enough clamping force or uneven fixture. Add pressure or shim it.
- Wrong Coordinates: Bad zero point throws off cuts. Recalibrate G54-G59.
- Fixture Blocks Tool: Too tall or poorly placed. Lower it or swap for a shorter one.
Beginner Slip-Ups
- Skipping Tool Setup: Wrong tool length or zero point messes up depth.
- Over- or Under-Clamping: Too hard warps it, too soft lets it move.
- No Margin: Poor placement leaves no room to finish the cut.
Handy Tips
- Use Helpers: Parallels or V-blocks keep it steady.
- Log Settings: Jot down what works for next time.
- Test First: Cut a simple piece to verify before going full-on.
Picking the Wrong Tool or Settings
Tools and settings are your hammer and nails—choose wrong, and the job’s a struggle or a wreck. It’s a frequent beginner flub, but avoidable. Here’s how to get it right and why it’s a big deal.
Why It’s Critical
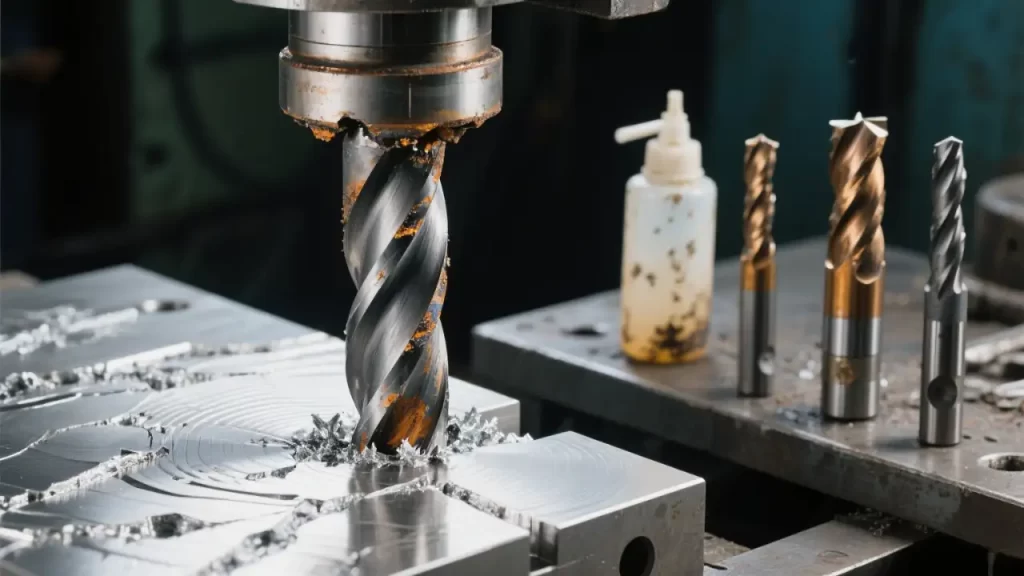
- Tool: What cuts, mills, or drills—like end mills, drills, or ball-nose cutters.
- Settings: Instructions for the machine, like RPM, feed rate, and depth of cut.Wrong tool or wild settings can trash parts, snap tools, and stress the machine.
How It Goes Wrong
- Material Mismatch: HSS tools on tough stainless wear out fast; carbide on soft aluminum sticks like glue.
- Size Off: Thin tools snap on big cuts; fat ones ruin fine details.
- RPM and Feed Guesswork: Too fast overheats tools, too slow clogs chips. Feed too quick breaks tools, too slow drags on.
- Greedy Depth: Cutting too deep to save time snaps tools or shakes the machine.
Steps to Get It Right
Step 1: Know Your Material
- Aluminum, steel, or plastic? Each has its quirks.
- Aluminum likes high speed but sticks; steel’s hard, so go slow. Check a material guide or ask the supplier.
Step 2: Choose the Tool
- Material: HSS for soft stuff, coated carbide for hard.
- Type: Flat end mills for flats, ball-nose for curves, drills just for holes.
- Diameter: Small for detail, big for bulk. Avoid long tools—they wobble.
- Tool packaging lists uses—give it a peek.
Step 3: Set Parameters
- RPM: Formula: RPM = (Cutting Speed × 12) ÷ (Tool Diameter × π). Speeds from the tool manual—aluminum 300-1000 ft/min, steel 50-200 ft/min.
- Feed Rate: Chip load (say 0.002-0.006 in/tooth) × teeth × RPM. Check tool maker’s recs.
- Depth: Start shallow, 1/4 to 1/2 tool diameter. Don’t bite off too much.
- Lazy? CNC software calculators spit out numbers—just plug in material and tool.
Step 4: Test It Out
- Try a scrap piece. Listen for noise, check the finish, look at chips.
- Weird sound or hot tool? Stop and dial down RPM or feed.
Fixes for Trouble
- Tool Wears Fast: High RPM or slow feed—cut RPM.
- Rough Finish: Dull tool or fast feed—swap tool or slow it.
- Tool Breaks: Too deep or too thin—go shallow, grab a thicker one.
- Chips Stick: Soft material? Add coolant or boost RPM to clear.
Beginner Tips
- Trust Maker Data: Tool specs or sites give solid starting points.
- Take It Slow: Steady cuts beat rushed wrecks.
- Note Winners: Write down settings that work.
- Ear On: Smooth hum’s good; screeches or shakes mean stop.
Skipping Program Checks
Checking your program is like glancing at the dashboard before driving—skip it, and don’t cry when you crash. Newbies hit “start” too fast, thinking the G-code looks fine, only to trash parts, break tools, or ding the machine. Here’s why you can’t skip it and how to do it right.
Why It’s a Big Deal
G-code tells the machine where to go and what to cut. If it’s off or unchecked:
- Tools smash into workpieces or fixtures—small fix for a tool, big bucks for the machine.
- Paths go haywire, sizes flop, parts get scrapped.
- Time sinks—ten-minute jobs turn into hour-long repairs.
Beginners skip it to “save time” or assume it’s good, but it’s like cooking without a recipe—odds are, it flops.
Where It Goes Wrong
- Code Blindness: G-code’s gibberish, so they skip it, missing key stuff like G54 or tool offsets.
- Blind Trust: Code from the web or a buddy runs unchecked—might not fit your setup.
- No Simulation: Machines and software can preview paths, but newbies skip it and cut blind.
- Edge Oversights: Code sends tools beyond the workpiece or fixture—crash city.
How to Check It Right
Step 1: Scan the Code
- Don’t need to master G-code, just spot basics:
- Coordinates: G54-G59 match your workpiece setup?
- Tool Calls: T and M6 right? No wrong tools.
- Moves: G00 (rapid) and G01 (cut) make sense? No wild jumps?
- Two-minute skim—focus on setup (start) and finish (homing).
Step 2: Simulate It
- Software like Fusion 360 or Mastercam runs virtual cuts. Watch for:
- Tool hitting fixture or workpiece?
- Full part covered?
- Odd empty runs or repeats?
- Sim’s free—mess up all you want.
Step 3: Dry Run It
- Flip on “Dry Run” at the panel—tools move in air.
- Raise Z a bit to avoid real crashes.
- Eye the path—matches the sim?
Step 4: Test Small
- Don’t go full throttle—cut a shallow slot or outline first.
- Use Single Block mode, step through, check each move.
- Chips and finish look good? Run it all.
Trouble Fixes
- Tool Crash: No reset (G28/G53) or fixture miscalc—check G90/G91 coords.
- Wrong Size: Bad offsets (G41/G42) or start point—recheck workpiece coords and tool data.
- Stops Mid-Run: Missing M30 or bad command—hunt red errors in the editor.
Beginner Tips
- Don’t Trust Blind: Web code’s iffy—verify it.
- Mark It Up: Comment key lines (e.g., “roughing starts”) for quick finds.
- Listen Up: Steady hum’s fine; screeches or shakes mean stop.
- Backup: Save the original before tweaks—saves your bacon.
Neglecting Maintenance and Cleaning
CNC machines aren’t “use and toss”—skip maintenance and cleaning, and it’s like never changing your car’s oil: trouble’s coming. Newbies think the job’s done when the part’s cut, but a dusty, dry machine loses precision, wears out fast, or quits. Here’s why it’s essential and how to keep it humming.
Why It’s a Must
- Chip Buildup: Aluminum or steel chips clog the table or rails, throwing off accuracy.
- No Lube: Dry bearings and rails wear quick—repairs ain’t cheap.
- Dust and Grime: Uncleaned, tiny bits sneak into motors or sensors, causing chaos.A filthy machine cuts junk parts and racks up repair bills.
Where Newbies Slip
- Post-Job Mess: Chips and coolant sit, drying into a stuck-on mess—next run’s a scrape-fest.
- No Oil: Rails and screws run dry, grinding along like a tired mule.
- Small Stuff Ignored: Dirty spindle or toolholder? Alignment suffers.
- Bad Cleaning: High-pressure air blasts chips into cracks—worse than before.
How to Keep It Clean and Smooth
Step 1: Clean After Cutting
- Sweep Chips: Brush or vacuum the table, fixture, and tool area. Don’t grab—metal chips bite.
- Wipe Coolant: Rag off wet spots—don’t let it eat the surface.
- Hit Corners: Rails and T-slots hide chips—dig ‘em out with a slim brush.
Step 2: Lube It Up
- Check the Manual: Lists where to oil and what (like ISO 68).
- Regular Grease: Rails, spindle bearings, screws—weekly hit, not when it squeaks.
- Don’t Overdo: Too much oil grabs dust—just enough.
Step 3: Inspect Key Spots
- Spindle: Chips in the toolholder? Soft cloth it clean.
- Toolholder: Spin it—smooth, no junk stuck.
- Guards: Clear dust from doors and slides—keep it out.
Step 4: Weekly Deep Clean
- Half-hour wipe-down, inside and out. Mild cleaner (like WD-40) for oil stains—no harsh stuff.
- Check wires, sensors—keep vents open.
Trouble Fixes
- Machine Shakes: Dry rails or chips—clean and lube.
- Poor Precision: Chips on fixture throw it off—wipe and retry.
- Spindle Noise: Low oil or stuck grime—stop, clean, lube.
- Stinky Coolant: Bacteria from neglect—dump it, refill, clean the tank.
Beginner Tips
- Set a Routine: Five minutes daily sweep, weekly lube—machine lasts longer.
- Tool Kit: Brush, vacuum, rag, oil can—keep ‘em close.
- Ear On: Smooth hum’s good; clunks or squeals mean check it.
- Don’t Slack: Cleaning’s a chore, but cheaper than repairs.
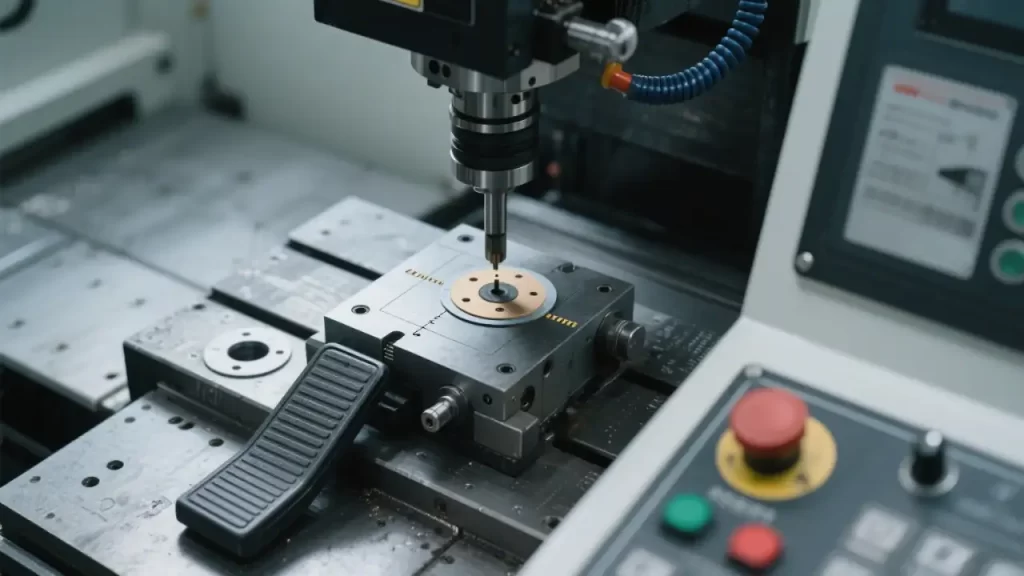
Not Knowing the Machine Interface
The CNC interface is like a new smartphone—don’t figure it out, and you’re lost pressing buttons. Newbies face a wall of keys, menus, and codes, feeling stuck. But it’s not rocket science—grab a few tricks, and you’re golden. Here’s why it trips you up and how to master it fast.
Why It Stumps Newbies
- Alien Tech Vibe: G-code, coords, F-keys, knobs—it’s overwhelming.
- Brand Differences: Fanuc, Siemens, Haas—layouts and logic vary, confusing beginners.
- Fear of Messing Up: One wrong click stops it—or crashes it.Unfamiliarity slows you down and risks screw-ups.
Where Newbies Trip
- Lost Start Button: Program ready, but “Cycle Start” hides—panic sets in.
- Coord Chaos: Machine vs. workpiece coords mix up—zero point flies off.
- Panic Stop: Meant to tweak, hit “Emergency Stop” instead—full reset hassle.
- Tool Swap Fail: Code calls for a change, but manual mode’s a mystery.
How to Get Comfortable
Step 1: Map the Basics
- Screen Layout: Program area (G-code), coords (X, Y, Z), status (running/paused).
- Big Buttons: Green “Cycle Start,” red “Feed Hold/Reset,” emergency stop—learn these first.
- Manual Peek: Snap a pic of the guide or note common keys.
Step 2: Nail Basic Moves
- Power Up Zero: Hit “Ref” or “Home” to reset to machine origin.
- Load Code: Find “Program/Edit”—USB or type in G-code.
- Manual Mode: Switch to “Jog/Manual,” use handwheel or arrows to move X, Y, Z.
- Tool Change: Check “T” (tool number) and “M6” (swap) in the manual—try it.
Step 3: Run a Simple Test
- Write basic G-code (e.g., G00 X10 Y10), load, “Dry Run” it—watch the tool move.
- Single Block mode—step through, track coords, feel the flow.
Step 4: Don’t Force It
- Stuck?: “Reset” or check error codes (e.g., “Alarm 100”).
- Menu Maze?: Ask someone or search model + issue online.
- Nervous?: Slow it with Feed Override—buy reaction time.
Trouble Fixes
- Won’t Run: Missed “Cycle Start” or paused—check status.
- Coords Off: G54 tweaked wrong—reset in “Offset.”
- Tool Frozen: Chuck’s tight—manual mode, try “M3” (spindle on).
- Error Pop-Up: Note code (e.g., “Overtravel”)—manual’s got answers.
Beginner Tips
- Start Small: Master lines and basic milling first.
- Cheat Sheet: Stick a list of key functions nearby—no manual hunts.
- Poke Around: Empty machine? Tap buttons, learn menus.
- Listen & Watch: Button works if it hums—silence means dig.